

Getting started with ScatterSpoke
A guided first session — create an account, let the onboarding interview build your workspace, and learn your way around before you collect any feedback.
Set up your workspace, learn where the main tools live, and choose your first feedback activity.
If a colleague invited you, accept their invitation using the same email address. You can join their workspace instead of creating a separate one.
1. Create and verify your account
Section titled “1. Create and verify your account”Open the ScatterSpoke sign-up page. Enter your email and a password of at least eight characters, then select Create account. Open the verification message in your inbox and follow its link.
See Register as a new user for other sign-up methods and help with verification.
2. Set up your workspace
Section titled “2. Set up your workspace”The onboarding conversation asks for your name, workspace name, and main use case. Answer in a sentence or two. For example:
I’m Maya at Acme Product. We want to understand what slows our team down between planning and release.
The Workspace setup panel fills in as you answer. Check the details and use Edit if a name or other value is wrong. When setup finishes, ScatterSpoke opens your workspace.
Account security options may appear during setup. You can also turn on two-factor authentication or add a passkey later under Settings → Profile.
3. Learn the sidebar
Section titled “3. Learn the sidebar”| Control | What you use it for |
|---|---|
| Workspace name | Switch to another workspace you belong to |
| Quick find | Find work by name; open with ⌘K on Mac |
| Surveys | Create surveys and review their responses |
| Retros | Facilitate team retrospectives, where enabled |
| Templates | Start from an existing survey or retro format |
| Ask | Explore feedback in plain language |
| MCP | Connect an AI tool to your workspace |
| Account menu at the bottom | Open settings, billing, appearance, or sign out |
Recent helps you return to work you opened recently. Search and lists apply to your current workspace.
4. Collect your first feedback
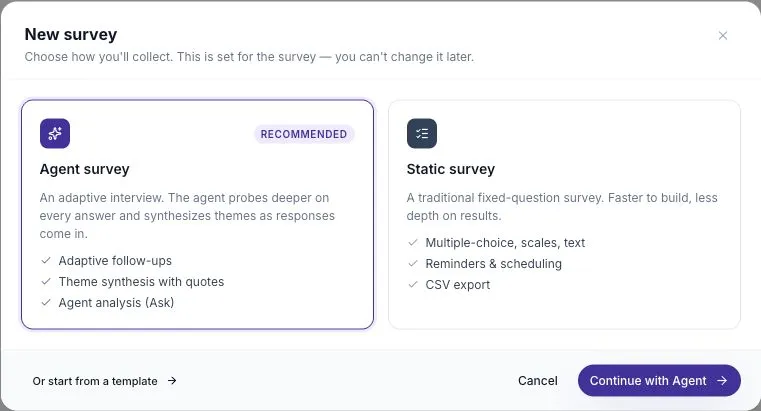
Section titled “4. Collect your first feedback”The New survey chooser may open after setup. Choose Static survey for a short set of questions, or close it and start a retro if your team is meeting together.
Pick one guided lesson:
- Your first survey: build and publish a short sprint health check.
- Your first retro: collect ideas, group them, vote, and discuss a next step.
5. Make a plan for the answers
Section titled “5. Make a plan for the answers”Decide who will review the feedback and when. After people respond, read the source material, use Ask to explore it, and share the action you will try.
How to use ScatterSpoke connects these steps into a repeatable routine.